Managing the images on your blog and more so editing them for a blog post can be a time-consuming process. It’s no wonder I see so many sites getting around where the owner has just dragged the image off their camera and uploaded it directly to the website.
But by not taking that time to edit, crop or resize (and rename the file for SEO benefit) your images before adding them to your blog you are directly contributing to how fast or slow in this case your blog is going to load. A blog post with say 5-6 images uploaded from your camera without any optimisations can quickly mean a page size of over 10MB and that can directly impact your site speed and SEO configuration.
Then consider that over the age of your blog you may have 1, 2 or even 5 years worth of images all contributing to bringing down the value of your site. Not to mention creating some rather large backup files to manage but that’s a story for another post.
When reviewing your website site speed one of the most common problems to fix is large images taking too long to load. But fixing all the images manually for a blog that is say 5 years old would be impossible without some sort of automated tool. And that’s where ShortPixel comes in.
ShortPixel can be added to your WordPress website via a plugin and linked up to their optimisation service. You then configure its settings to allow you to bulk optimise all the images already uploaded to your site. Along with having it run across all new images added as well.
The plugin can be installed directly via the Add Plugin feature just search for “ShortPixel Image Optimizer” and install it.
The service has a free pricing tier of up to 100 free image compressions a month. That’s not a whole lot but a great starting point to let you at least start compressing the current images you are uploading to your site and see how they look. I would suggest taking up a monthly plan (costs as low as $4 for 5k images a month) or at a minimum, one-off purchase of credits to bulk optimise your entire media library.
Setup wise once you have a registered account with them you want to configure a couple of options to get the most out of the plugin.

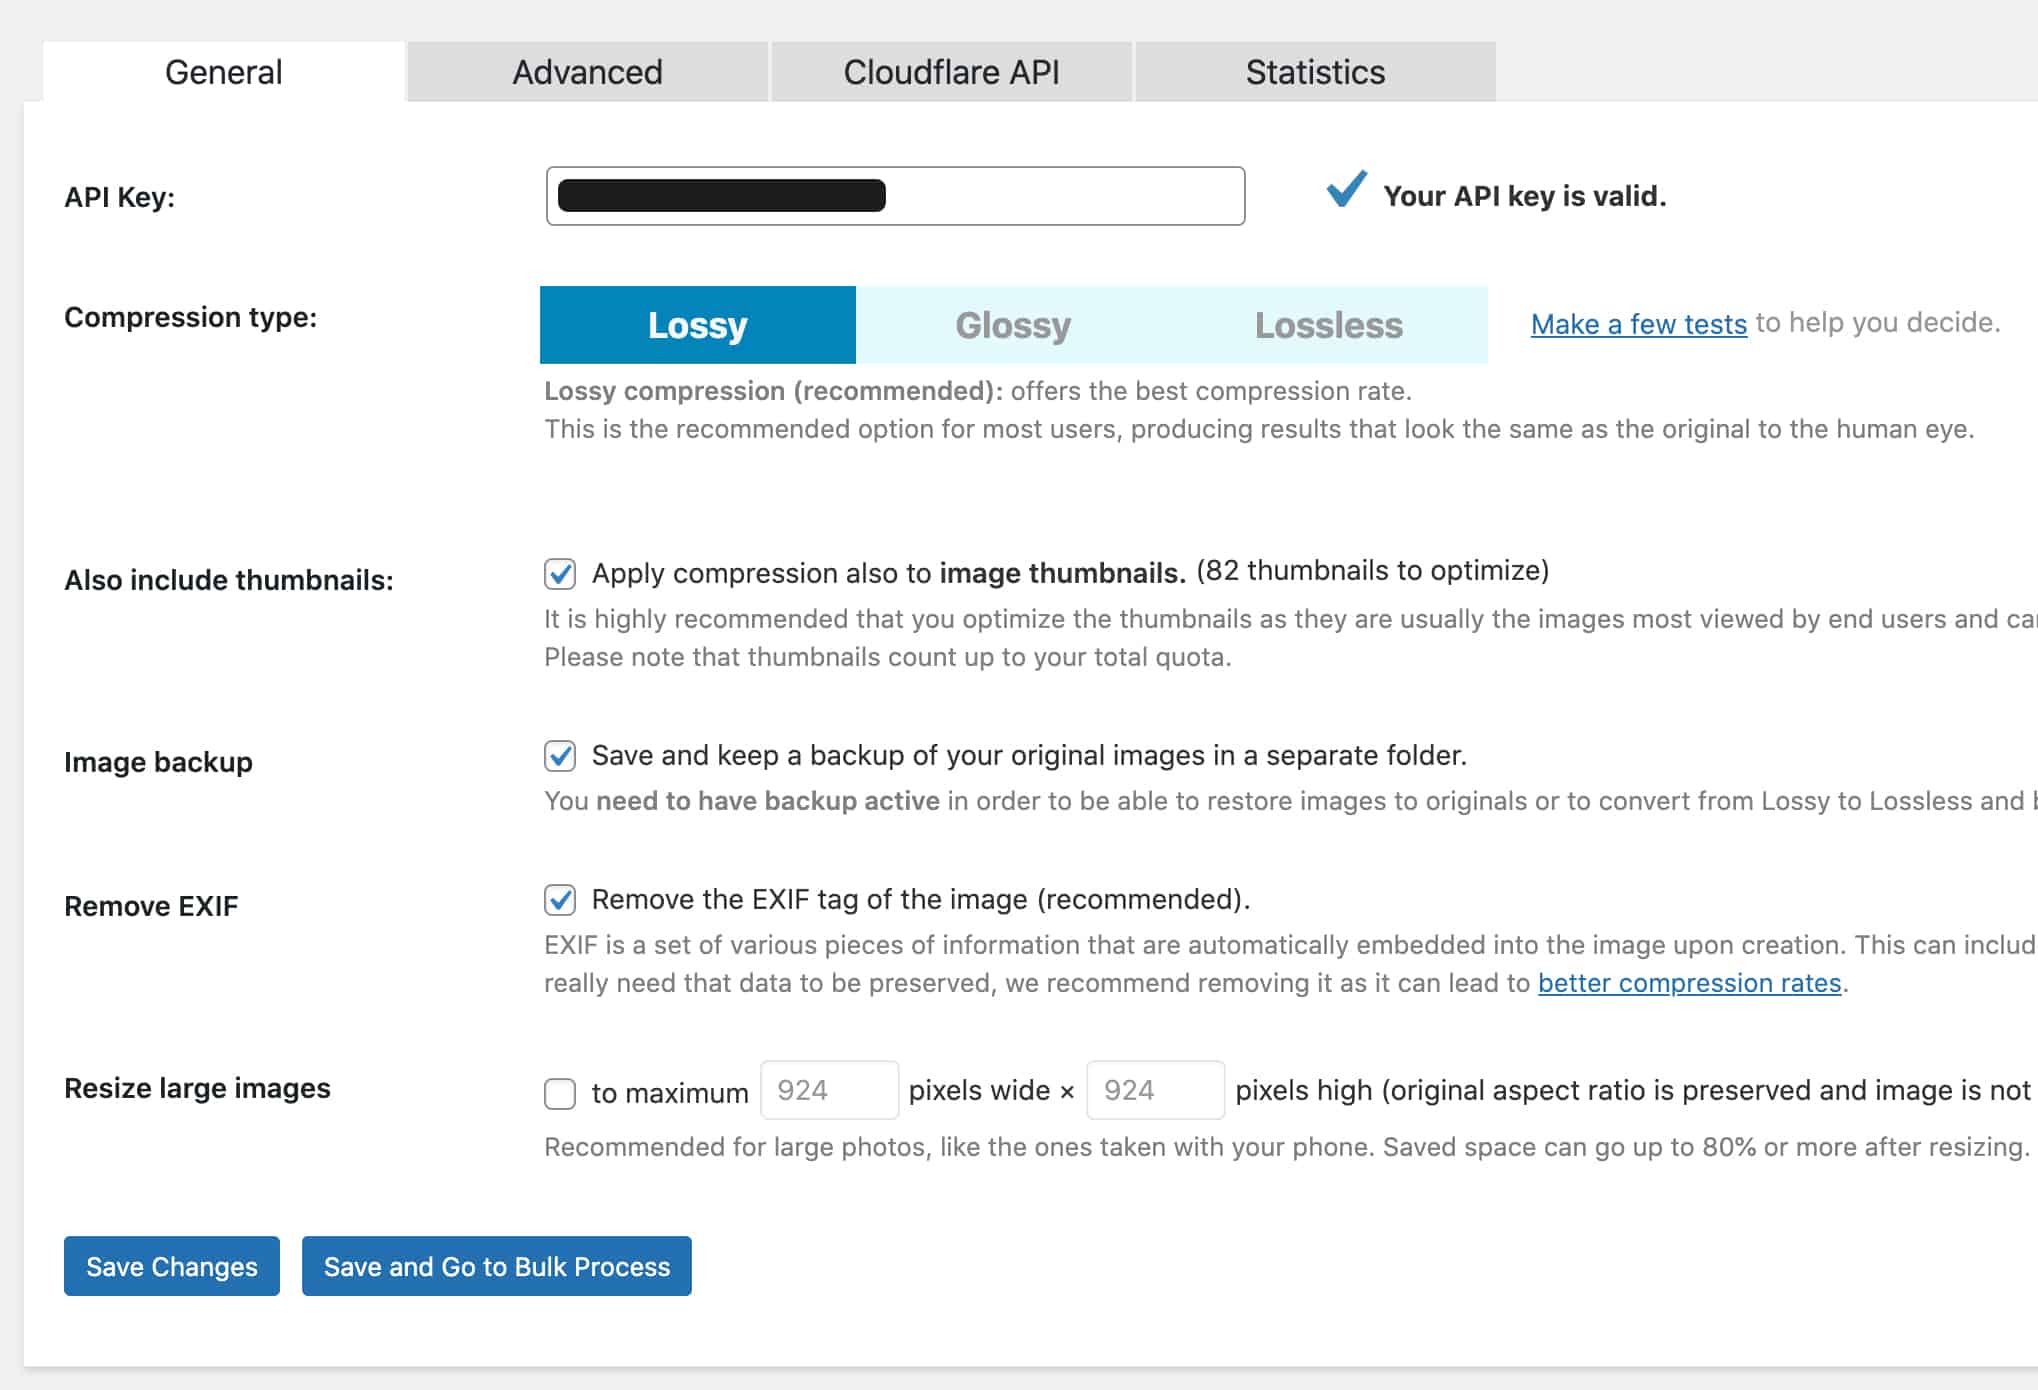
On the main General Settings page you enter your API key at the top.
You want to look at making sure you set the options to include your thumbnails so all images on your site get the optimisation treatment. Now keep in mind 1 image credit covers one image file. If your theme for instance creates 5 versions of the 1 image you upload to provide different sized images for various places on your site then every single image you upload could use 6 credits with Shortpixel.
Depending on how much you trust the plugin to not mess with your images, you can leave the backup images option checked or not. For nervous clients or real image purists, I like to leave the backup option on just in case you need to roll back. Long term though once you are happy with the image quality I’d turn this setting off.
Removing EXIF from your images takes out the metadata of the image to help get the file size down. Unless you need that data in there for copyright or specific use cases I’d have that removed as well.

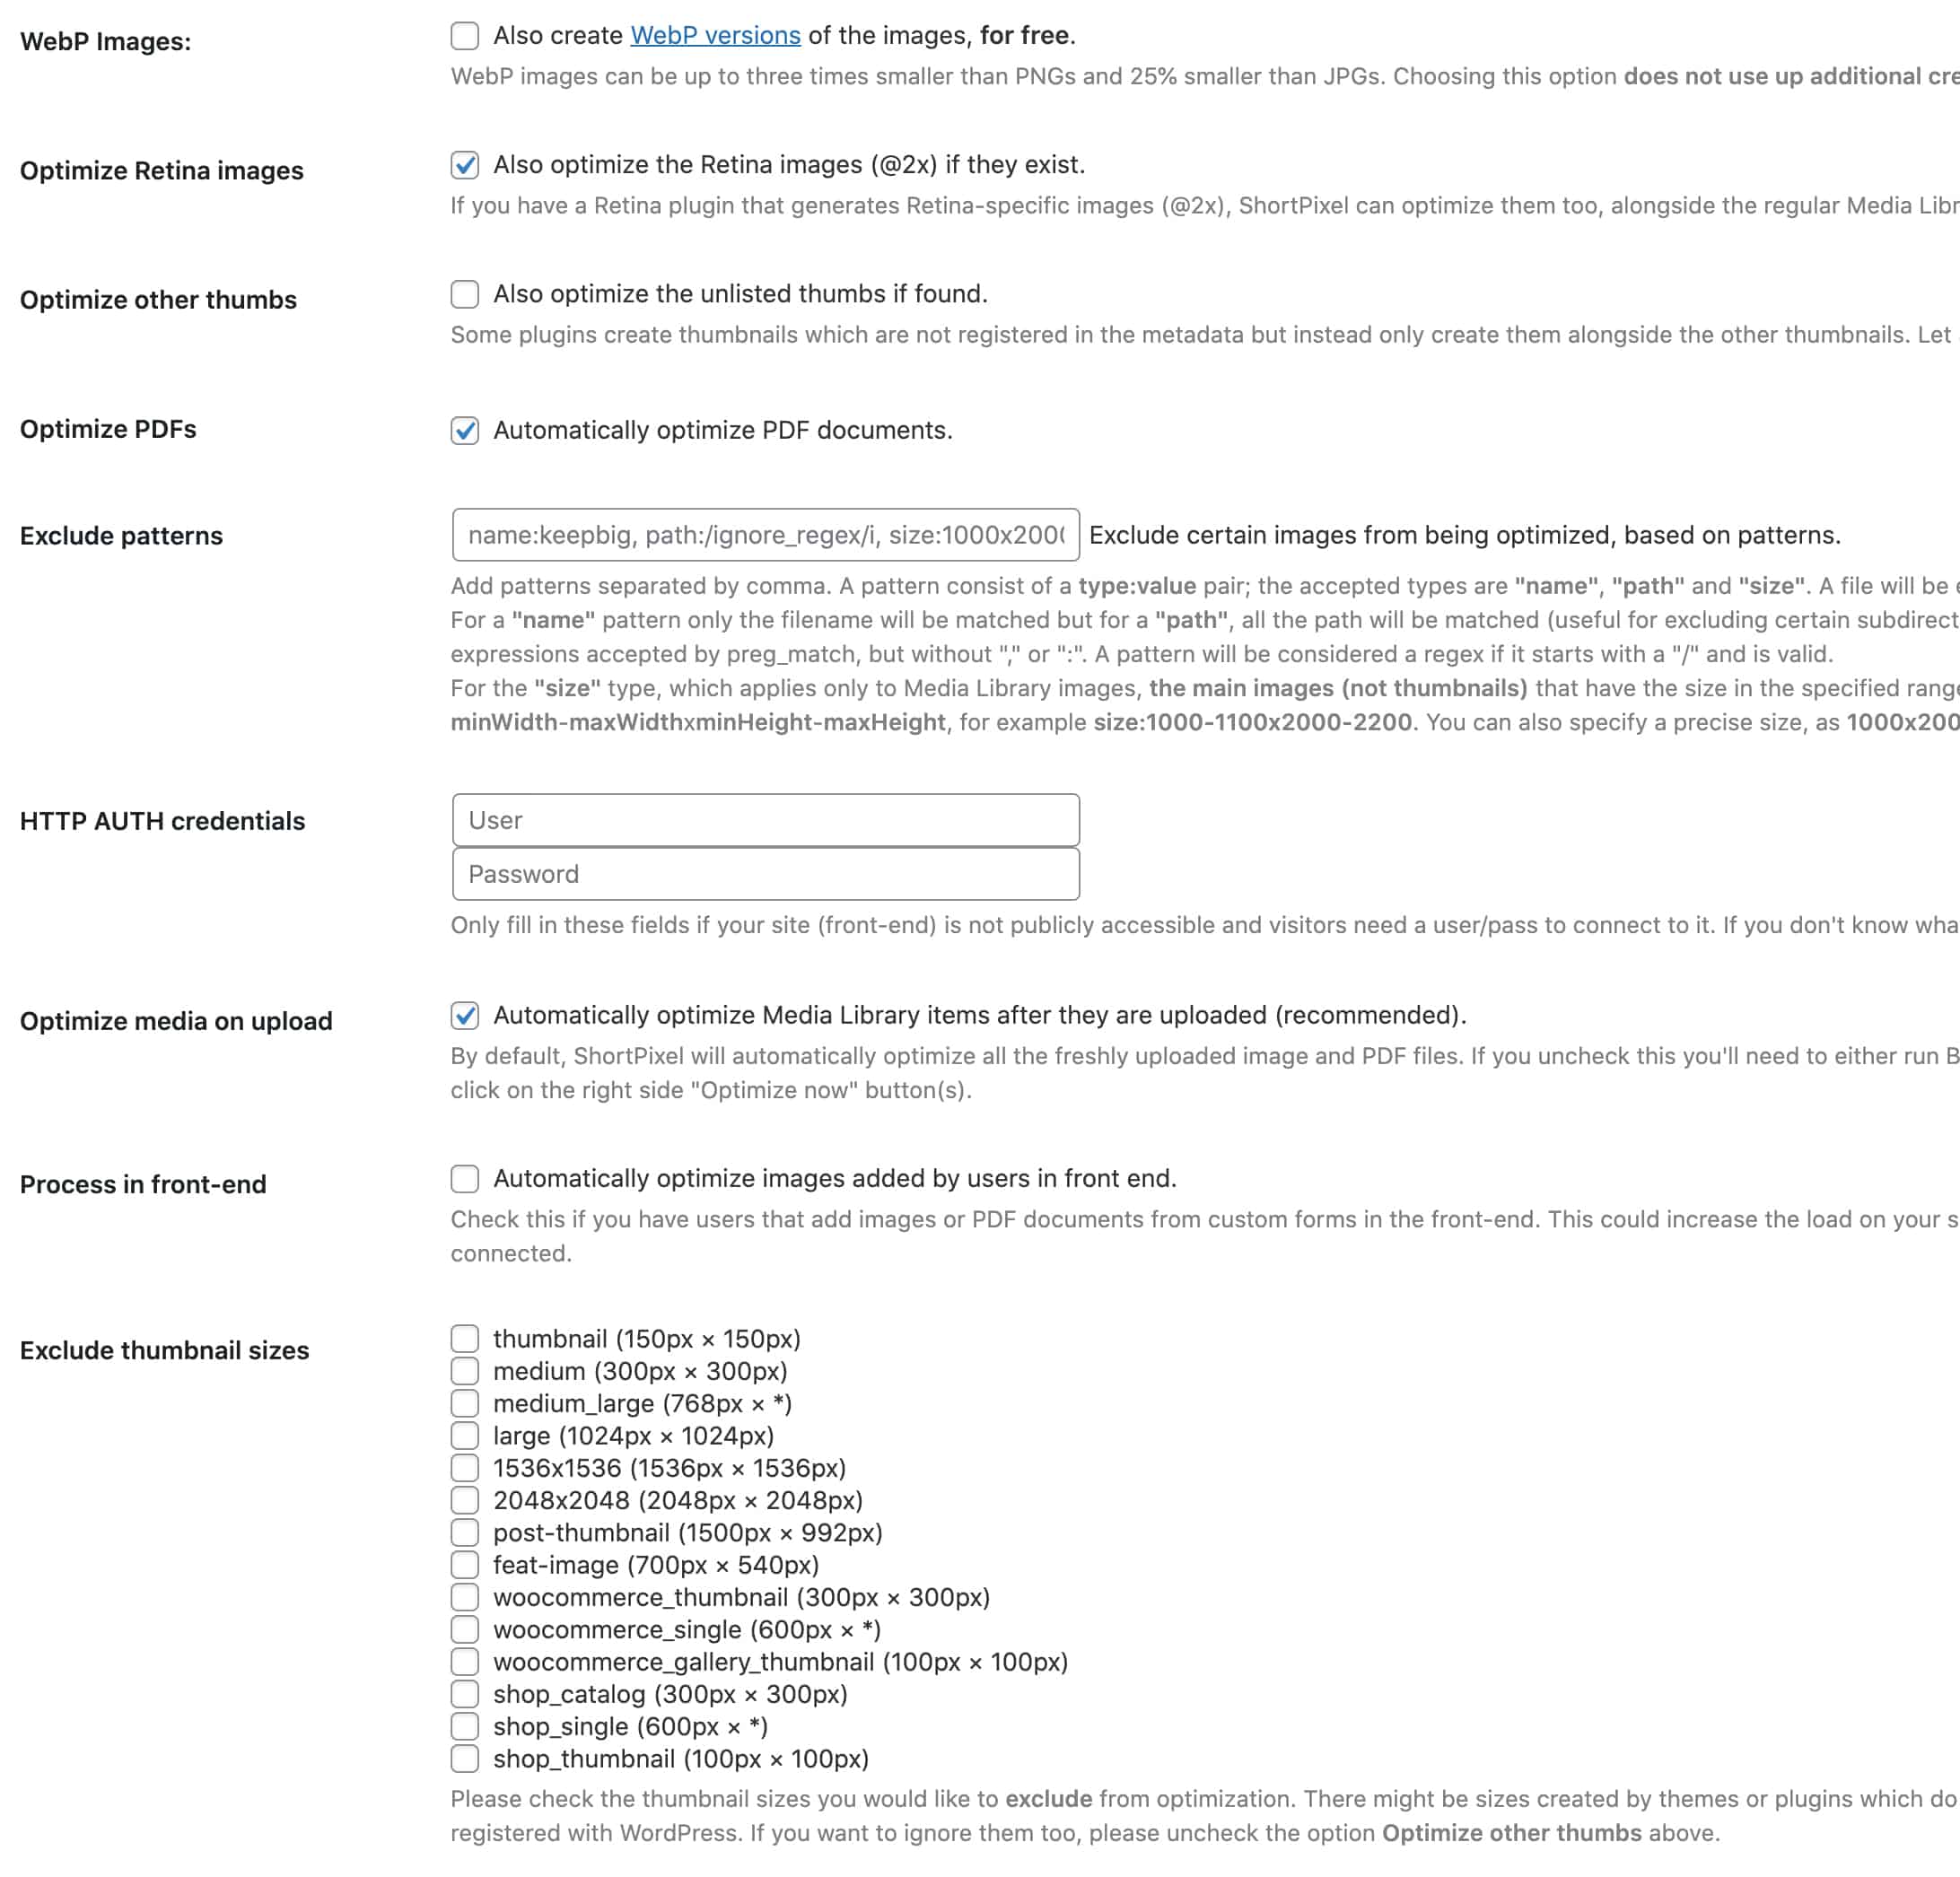
Moving onto the advanced setting tab there are 2 settings you can configure, the rest are best left at their default.
First up is the option to convert your images to be WebP images. Webp is a modern image format that is said to be smaller in size than your traditional JPG and PNG files of old. Given this is a free feature and it can help your site speed it’s worth having this turned on to review how much it helps your performance.
The second option to turn on is allowing the plugin to optimise media on upload so all new images added to your site get compressed for you automatically.
Just adding the plugin isn’t going to magically make things better though. Having this plugin on your site doesn’t allow you to get out of editing the images locally on your computer first to resize and crop it to the perfect size. The ShortPixel plugin is there to get the most out of your images so they are as small as they can be without dropping quality.
If you don’t currently have a program on your computer to allow you to edit and crop images I recommend taking a look at a program called PhotoScape. The plugin is free and works on both Windows and Mac making it a good all-round option.
By following a simple process of editing your images locally on your computer and allowing ShortPixel to help get that bit more out of your image compression you’ll be well on your way to ruling out images as a speed problem for your website.

