You’ve decided to start a blog. Have installed WordPress and just logged into your dashboard for the first time and have no clue what to do next? Don’t worry. We have got all the tips you need to correctly set up a WordPress website, and start blogging today.
1. Set your permalinks
Permalinks control what the URL’s for your blog posts will look like. For this, I recommend you pick the “Post name” option. This avoids unnecessary wording in the URL and helps keep your URL’s that bit shorter and easier to read and remember.
To set your permalinks on your website, click “Settings” and then “Permalinks” in your admin menu to the left. Then, select “Post name” from the list of radio boxes and save changes on the setting page.

2. Set the website name, tagline and timezone
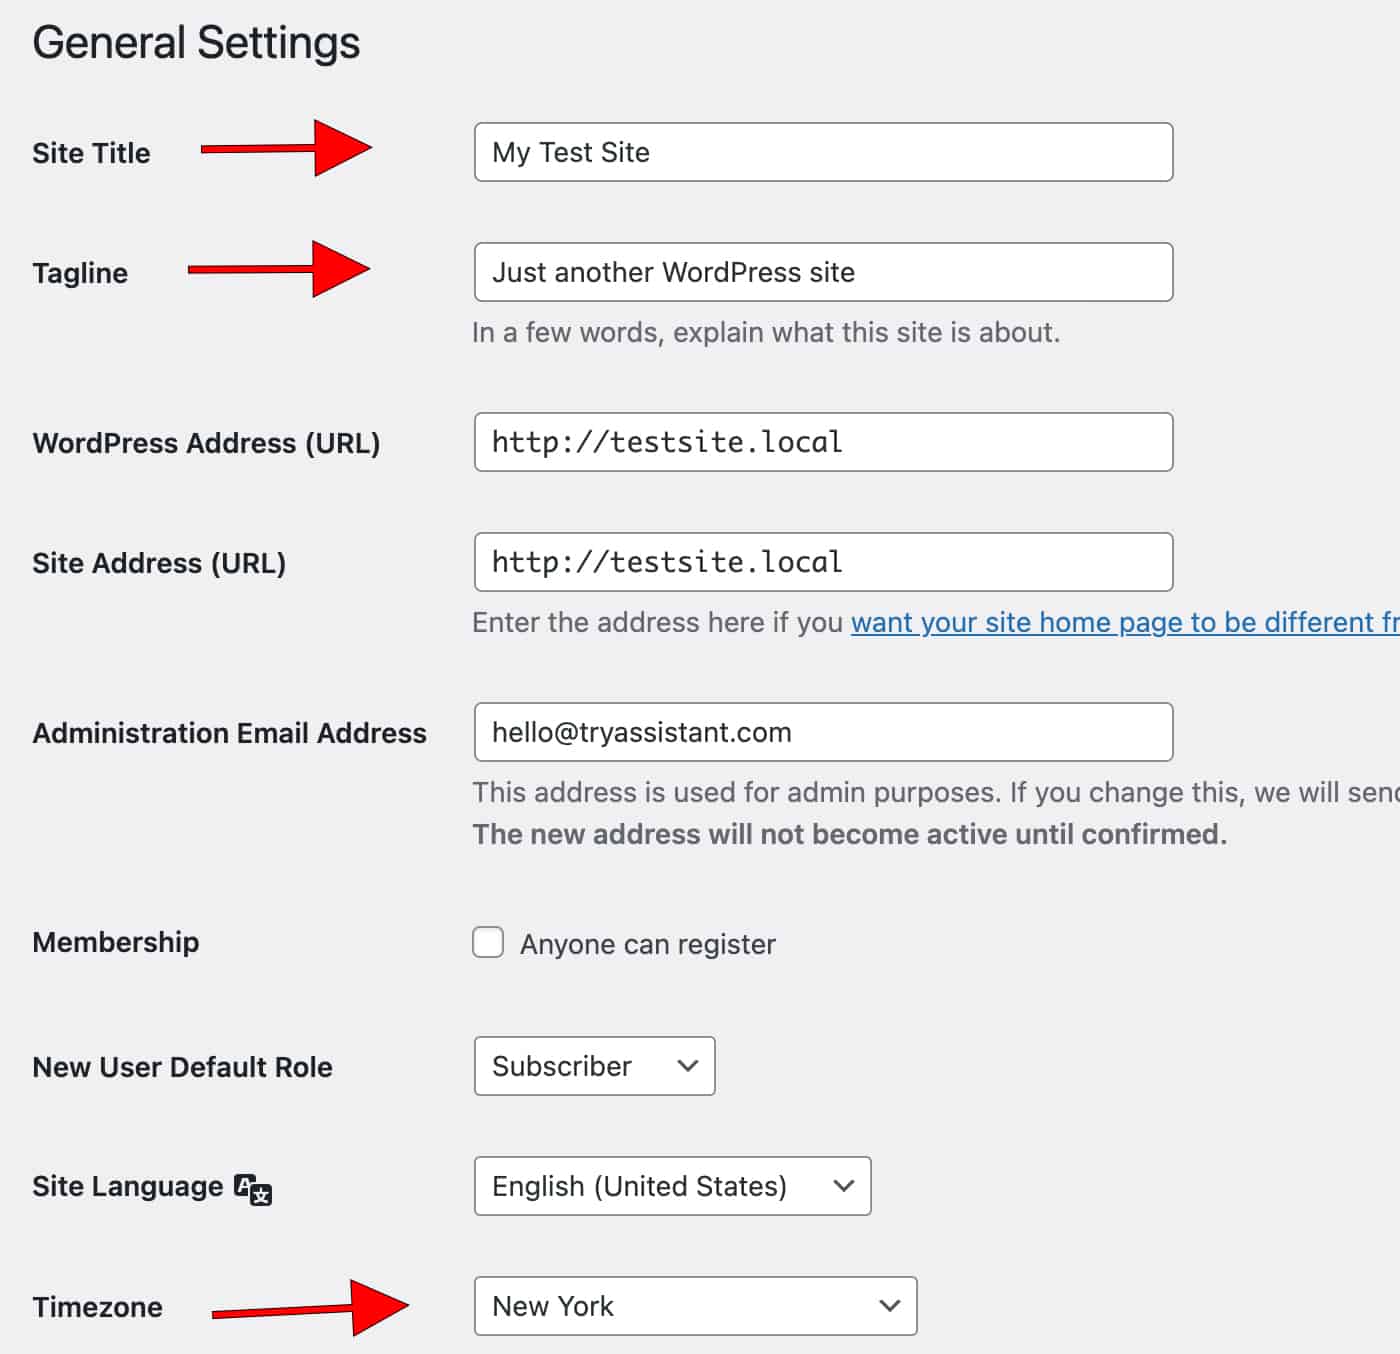
If you don’t set these up correctly, you may find the wrong name showing up on your website in searches or when a post is shared online via social media. And with the timezone, you’ll end up with scheduled blog posts getting published at the wrong time of day.
To set these, navigate to “Settings” and then “General” in your admin menu. At the top, you can set the title and tagline of your site. Think of the tagline as a short few words that sum up what your site is all about.
Then set the timezone to help you correctly scheduled posts to go live and so you can know what time of the day (or night) you are getting comments and interactions on your WordPress website.
3. Remove default content
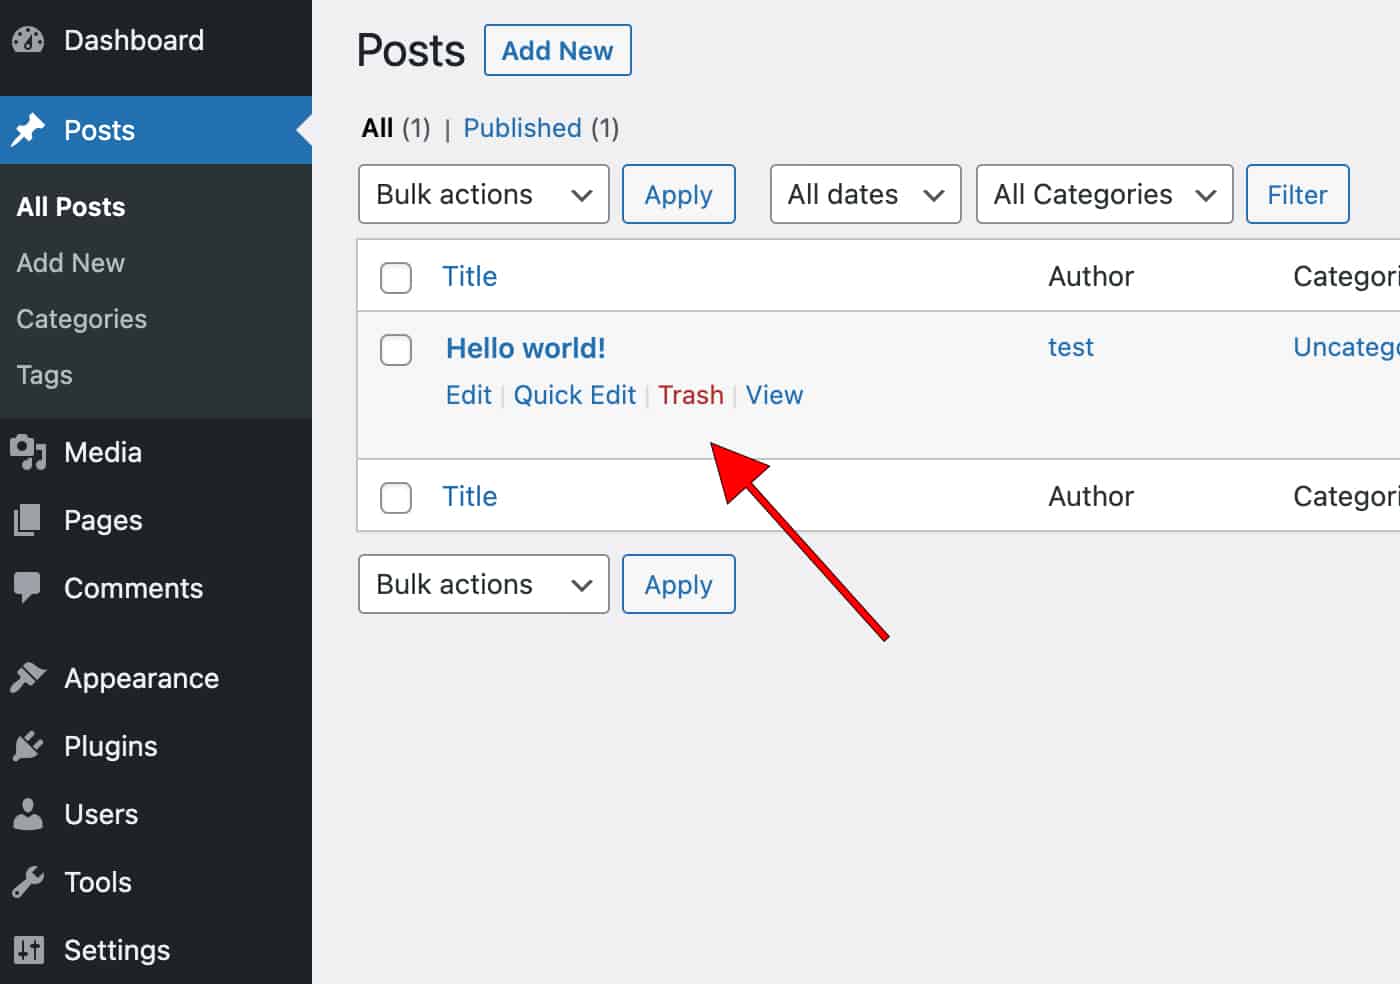
When you start to set up a WordPress website, it comes with a dummy blog post titled “Hello World!” and a page called “Sample Page“. They exist as placeholders to welcome you to the post/page editor. But their content isn’t relevant to you, so we want to remove them before you start adding your own content.
To do that, click on “Posts” and then “All Posts” from your admin menu and then hover your mouse over the title of the post. You’ll see a menu appear below the title where you can click “trash” to remove it. You can also check the box next to the title, and from the “bulk actions” drop-down, select “Move to trash” as well.
Then do the same process under the “Pages” menu item to remove the sample page from your site.
An additional tip if you ever import demo content from a theme you install on your site. The theme will import several posts and pages to help get the design right on your website. Once you’ve mastered how the theme works and started adding your own content, be sure to remove all the leftover pages the theme demo import left behind.
4. Edit default category
WordPress comes set with just one category for your content, “Uncategorized“. As part of mapping out the content you write on your blog, you’ll need to set categories to label/assign your content into different sections on your site for readers to find.
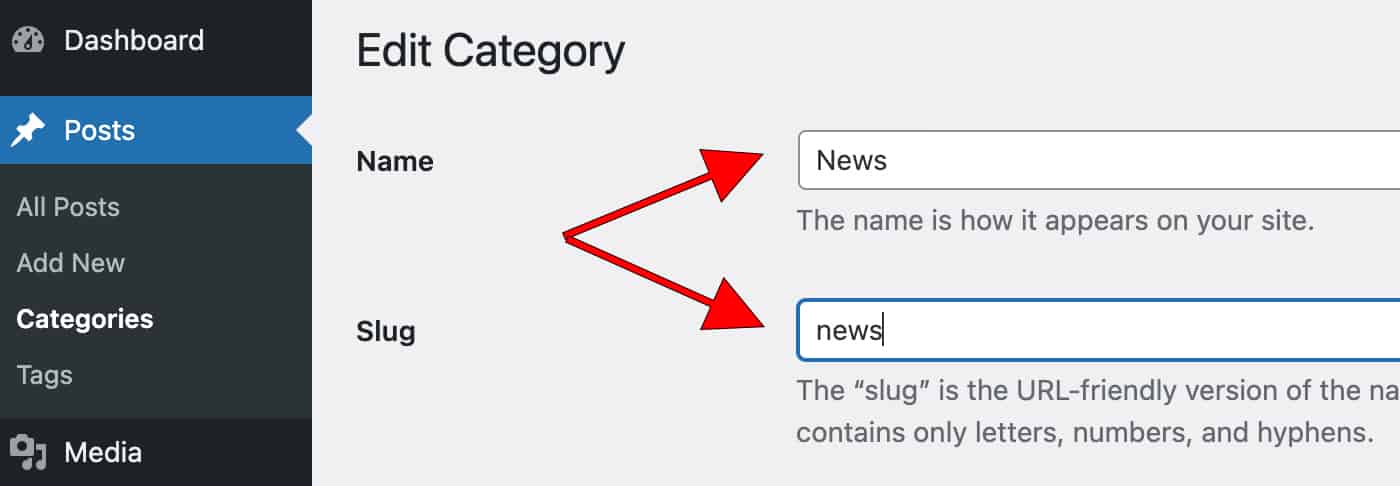
That default category will become your go-to option should you forget to tag blog posts into a category, so it’s good to rename it to be something a bit more relevant to your site. I often change this to be something like “News” or “Updates” to feel more welcoming.
To rename the default category on your site, go to “Posts” and then “Categories” from your admin menu. Click on the “Uncategorized” category listed to the right to edit it. Then rename its name and slug to your chosen option.
5. Complete your profile
Every website needs an author or two, so it’s good to make sure you fill yours out correctly. You want your name and biography description showing on your articles if your theme supports it. Your readers will want to connect with you, the writer, so getting to know you is key.
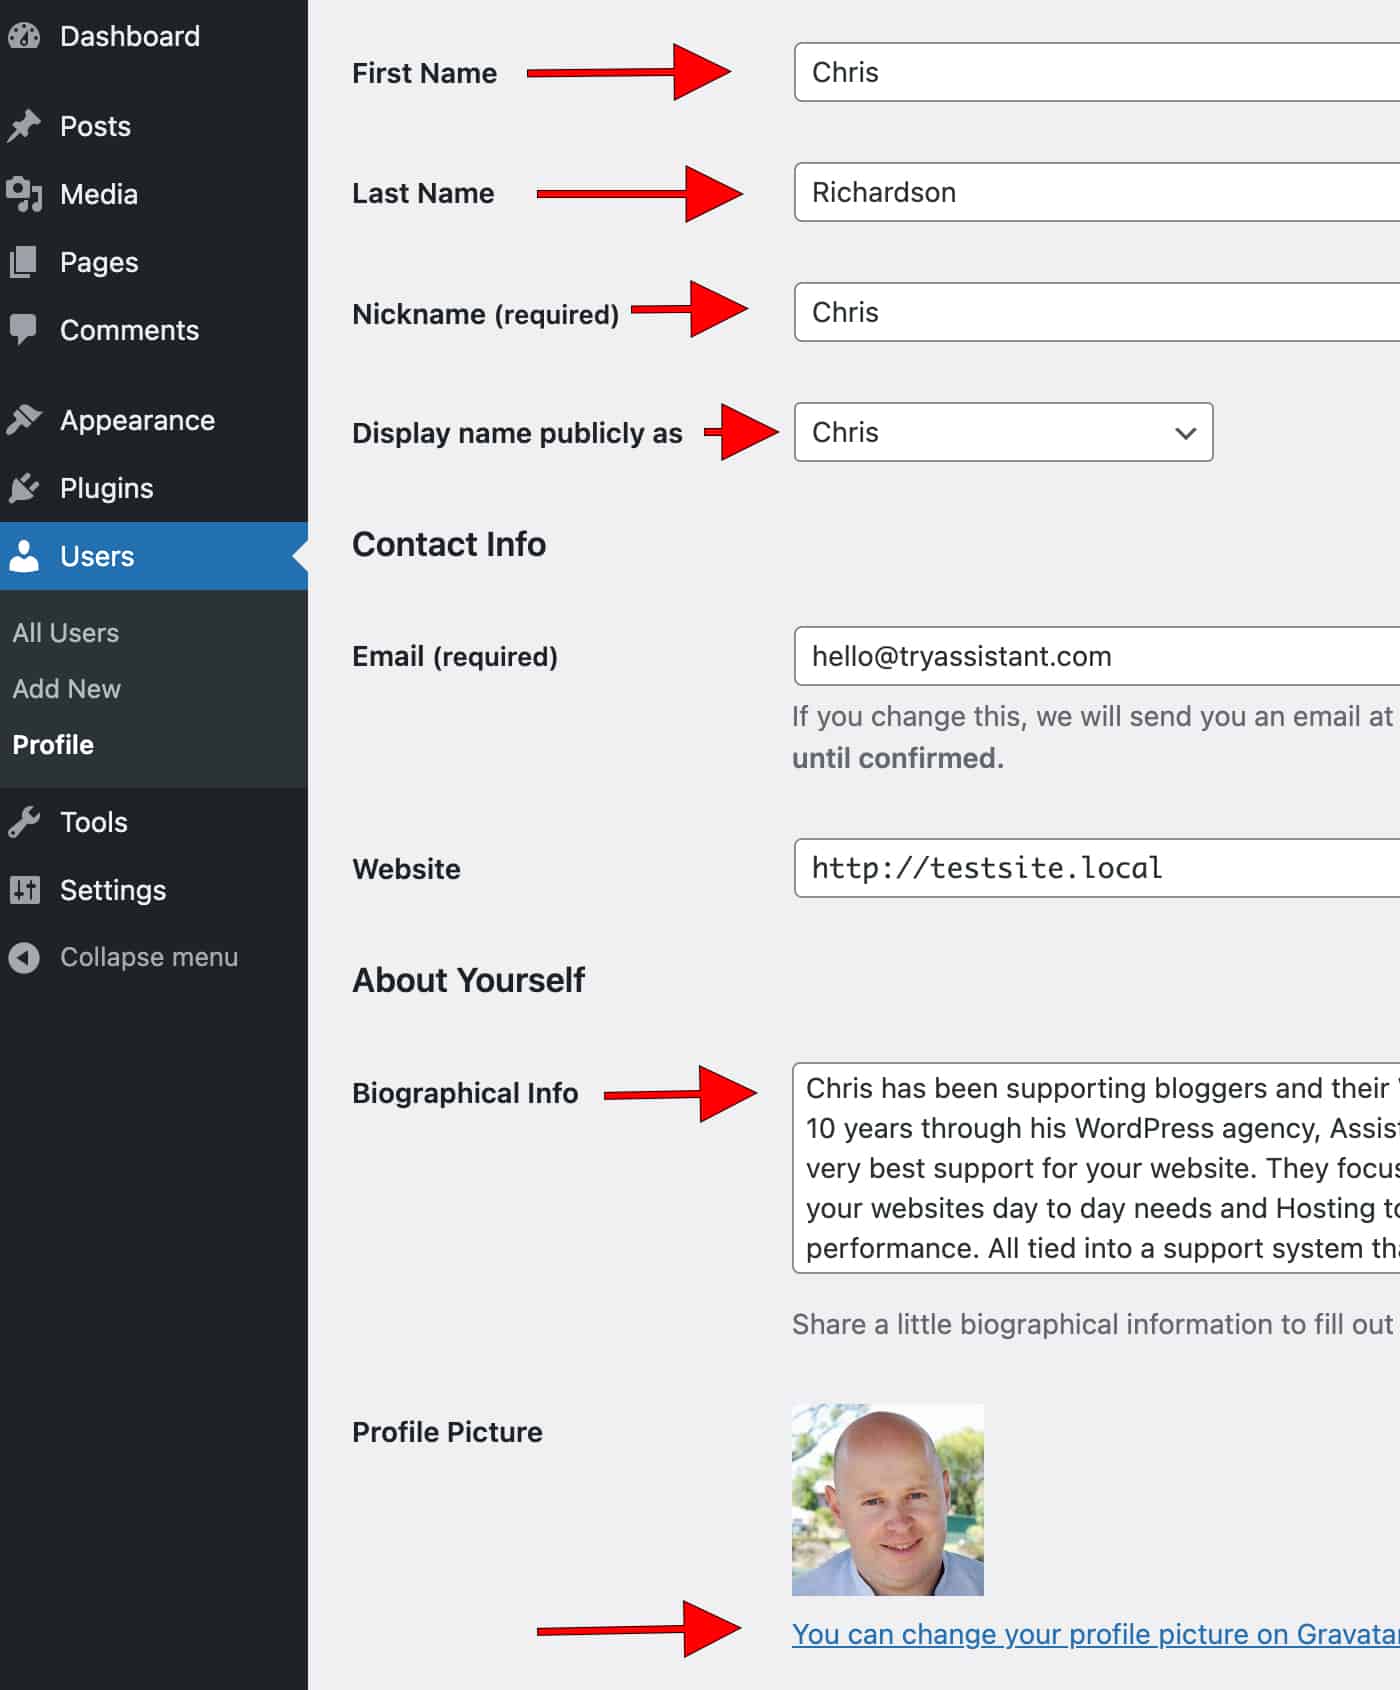
To fill out your user profile, click on “Users” and then “Profile” to edit your user account. Here make sure you fill in your name, nickname (usually your prefered first name you are known as), along with the display name that will show next to all your articles on your site.
Then scroll down and fill our your biographical info as well. Once installed, some themes will have their own section for an author box in here as well, so once you have a theme set up, come back and ensure any other fields related to you are filled out.
It’s also a good tip to link the email address you use on your user profile with the Gravatar service. This ensures an image of yourself is associated with your chosen email address. What this does is that if you comment on your blog or other WordPress blogs, a little image of yourself shows up next to your name.
6. Install these must-have WordPress plugins
One of the great things about WordPress is extending it with plugins to add new features. The options are endless and, at times, just confusing. So we’ve collated a list of must-have WordPress plugins every blog should be adding as part of how you set up a WordPress website.
7. Install a theme
There are a million and one different themes for WordPress. The right one for you is the one you like the look of the most and feel will offer you the best jumping-off point to start your blog. While there are plenty of free themes on offer, I’d suggest spending a little bit of money on a paid theme.
A paid theme will give you support to help set it up, which can be invaluable as a new blogger. On top of that, paid themes usually come with more features, are more customisable and will often have a community of customers who all use the same theme so you can network with and learn from them as well.
The key to finding the right theme is picking one that does not require you to spend too much time getting it looking perfect. You don’t want to waste weeks trying to tweak it. You want something you can install today and be writing content for the world to read by next week.
Please keep it simple for your first theme as well. You’ll change themes several times over the life of your website, so while you are still learning to blog, don’t expect to find “the one” theme you’ll build your brand on at the beginning.
8. Start producing content
With all of the above done, you can now start writing, and I mean writing. Without content, you have nothing for people to visit your website for. Jump into working with the post editor under “Posts” and then “Add New” and start producing content.

The posts won’t be perfect, and you’ll look back in 12 months and think, “what was I doing” in those early blog posts but don’t worry. Everyone starts at the beginning. Push on and write because people don’t come to see how pretty your logo is or what colour you chose for your theme at the end of the day.
They come to read what you have to say.
And that’s how you go from a fresh install of WordPress to blogging in no time.
The above is an oversimplification of all the steps I know, but keeping it simple is the key to enjoying blogging long term.